|
This Months Meeting 7.30pm,
Tuesday 15th June. Washing Models/Assessment Night
The June meeting will also be an assessment night. So if you want to see how your finished model stacks up against competition judging criteria, bring it along to be assessed. Lance will also be organising a photo shoot, so if you have a favourite model you want pictures of, bring that along too. |
|
The Editor’s Desktop Hard to believe that we're now half way through the final year of this millennium and that the millennium bug is fast approaching. It seems like only yesterday that I took over as editor of the newsletter and I would certainly like to take this opportunity to thank all those who have provided such positive feedback. This edition includes Terry Moyle's article on using the ALPS MD-1000 printer to create decals for your models, and I must say that mine is already paying for its self. I have produced two sets of markings for aircraft that were either not previously available or would have cost me $25. With savings like that, this device has made obscure colour schemes much more accessible and easier to produce. No more rummaging through the spares box or sending off overseas for the necessary decals to finish a project. I must admit that the printer is not without its drawbacks, but it has certainly opened many more avenues for modelling. After the very successful Model Expo at Queen's Birthday Weekend, discussion turned to current developments in the modelling industry to make life "easier" for the modeller and to present more detail for those aftermarket detail sets. Such things were discussed as:
While a lot of this may seem far-fetched, most of these are already in use on a commercial level. How long then before they are available to the modeller for personal use at a reasonable price (remember the near $40,000 price tag on the first Pentiums - now available for a couple of hundred dollars?). We then have to ask, when does true modelling end, and computer aided construction begin. How far does the hobby need to go before the enjoyment is taken out of it, and models are built at the press of a button? Like everything, is automation destined to make display cases fuller, and modelling skills unnecessary? Anyway, that is not something we will have to worry about for quite some time, and the club meetings we have planned for the next part of the year should see these skills expand, as we endeavour to impart skills and tips on producing more realistic models. See you at the next meeting, |
|
The Chairman’s Bit A big Thank You to Terry Moyle for his very inspiring talk on making your own decals. I know of 4 members, including myself, who have already purchased an ALPS printer since the last club night, so keep your eyes out for a few original schemes in the future. Thanks to all those that turned up at Model Ex this
weekend (especially Bob Cox for arranging it). We had a good-sized display and I am sure
we'll get some new members judging by the interest shown in our display. Cheers, |
|
Upcoming Events 1999 Events Forecast July August September October November December Proposed Awards Y2K Competition |
|
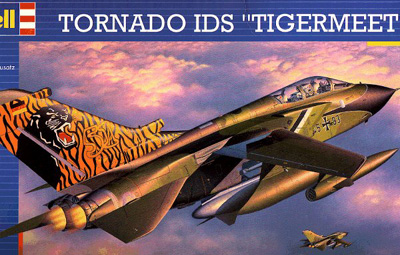
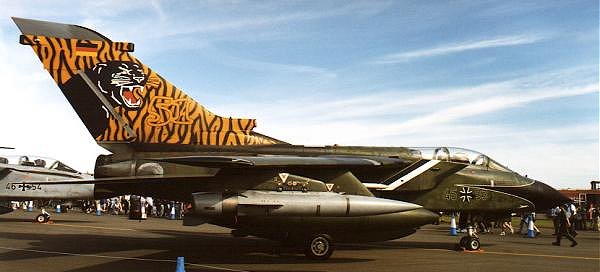
Revell 1/72
Tornado IDS "Tigermeet"
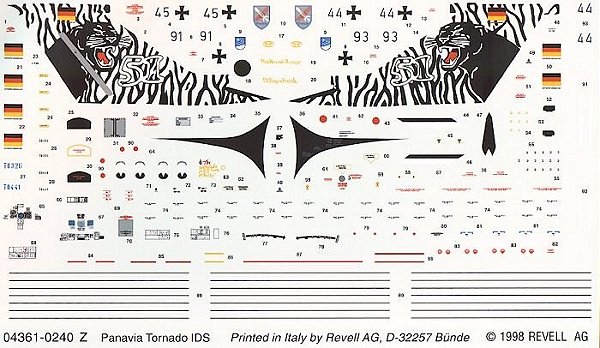
This is NOT the Italeri Tornado repackaged by Revell Germany as the Tornado ECR variant. Instead, it is a scaled down model of their newly tooled 1/32nd scale Tornado. This means there is now a very finely detailed model of the Tornado at a much more competitive price than the (still very buildable) Hasegawa kit ($18 for the Revell kit, as opposed to $35 for the Hasegawa kit). The parts come moulded in dark green plastic on 4 large sprues. There are 10 clear parts including canopy and windshield, HUD, and navigation and landing lights. Instructions for this kit consist of a 20-page black & white booklet, including 55 clearly illustrated assembly steps and 5 pages of painting and decalling instructions.
All panel lines are finely recessed, including some beautifully executed rivets. Instrument panels, have details moulded on, and the consoles are moulded to the cockpit tub and consist of raised detail, though there are decals on the sheet for these items. Each main gear consists of 4 parts including nicely flattened tires and brake lines. Options include open or closed speedbrakes and canopy, extended or retracted refuelling probe, sweepable wings (including a circlip arrangement for the pylon mounts to allow them to swivel), moveable tailplanes, and raised or lowered landing gear (though no pilot figures are included). Revell Germany has accurately captured the fine lines of this modern NATO aircraft (currently used by Britain, Germany, Italy and Saudi Arabia). The canopy is the correct length and in the correct position (as opposed to the slight errors in the Hasegawa kit). The only faults I could find with the Revell kit, was firstly, the nosecone is still not quite the right profile, and the air intake at the base of the fin is also about 1 mm too long.
Unfortunately, this model is only configured for a Luftwaffe aircraft. Various small changes will be needed if this aircraft is built as an RAF variant (GR.1, GR.1A, etc.). These are mainly small changes. The rear ECM fairing on the top of the tail is about 1mm longer on the kit of Luftwaffe aircraft. The most noticeable omission for an RAF aircraft though, would be the Laser Ranger and Marked Target Seeker (LRMTS) fairing under the nose. The pylons have sway braces moulded on and these should be removed for the wing pylons and replaced with the fairings which cover the ERUs on the RAF aircraft. The intake ramps on RAF variants (except the F.3) are fixed fully open, so some surgery will be needed to change the position of these. Stores on this kit include two AIM-9L Sidewinders, a Cerberus ECM pod, BOZ-107 chaff/flare dispenser, MBB/Aeritalia reconnaissance pod, as well as a buddy-refuelling pod, and a pair of 1500 litre drop tanks. The decal sheet has the decals printed in semi-gloss finish on the new lower-visibility carrier film. A multitude of stencilling and marking decals are included. Options for three German IDS aircraft in the current Luftwaffe camouflage are included:
The first option is the aircraft illustrated on the box top and includes an impressive single piece decal for the artwork on the tail, of which the modeller is expected to paint the yellow background first. I can highly recommend this kit for anyone wishing to build a 1/72nd Tornado, and with some simple modifications, one which will represent the IDS, GR.1, GR.1A or GR.4. |
Member Profiles Kevin
Benson - Club President AKA: Insect DOB: 26 November 1964 Place of Birth: Auckland, NZ Occupation Scientist (mad) Modelling Interests
Other Interests Women, Music, Cricket, Astronomy, Women, Alcohol, Films, Wrestling, Dogs, Women, Sci-fi, Internet, Soccer, Spicy food. Current/Future Projects Atrocities of the 20th century (various bad taste military dioramas in 1/35th) 1/32: F-4 Phantom, GR.1 Tornado, F-14 Tomcat 1/48: F-84 Thunderjet, Skyray, Zero, He 111, F-117, Skyraider, etc. Misc.: heaps of 1/16th, 1/9th and 1/6th figures |
|
Mark Robson - Club Secretary
I am a 34 year old veterinarian who builds mostly aircraft. One of my earliest memories is battling my father to let me build the Airfix Wellington instead of him having all the fun - I must have been about 5. Hence I have a sort of infatuation with Airfix kits, even if the company is a shadow of its former self. I build in any scale, and am more likely to be attracted to subjects with pleasing aesthetics, or those associated with an historical event. I am just as interested in full size aeroplanes. I haven't built a ship for 15 years, but intend to restart soon, and I have one half-finished tank kit, so I guess I'm an armour modeller also. My new millennium resolution is to finish more of the approximately 35 kits that I have half-completed, and more of the 800 - 1000 I have yet to start. |
Craig Sargent - Newsletter Editor
My modelling exploits began at the tender age of 5. For my 5th birthday, my grandparents presented me with a 1/72 Revell Macchi C.200 Saetta and four bottles of paint - red, blue, white and black. Made for an interesting colour scheme reminiscent of something that might be found on an American Bicentennial aircraft. Over the ensuing 1/4 century, I've built multitudes of kits - aircraft and helicopters mainly, but there have been 3 ships (Admiral Hipper, Bismark and currently, an Airfix Leander to HMNZS Waikato conversion), 3 cars (RX-7, VW Golf, and "General Lee"), more than a few tanks, and the odd figure. Unfortunately most got "binned" when I left the Air Force, due to non-repairability or missing parts, from lots of moving around due to postings. I left school and joined the RNZAF, where I spent 10 1/2 years trying to keep our front line aircraft working electronically. This also allowed me to follow my interest in aircraft and got me to some places not many people would be able to get to - flights in Macchis and Strikemasters, Orions, and Hercules. In fact other than the Skyhawk, I was able to fly in every aircraft the RNZAF currently has on inventory. I also had a 6-month tour of duty in Italy training to maintain the Macchis. During this posting, I had the opportunity to look over the AMX, Tornado, MC.200 and 205, MB339K and Starfighter (unfortunately, no photos were allowed). Main interests now are 1/72nd Israeli and US Marine Corps aircraft and helicopters, though I have some 1/48th and 1/32nd aircraft in my collection. My collection currently only numbers 84 (small by some standards), and most are at least 50% finished. Current projects nearing completion:
|
|
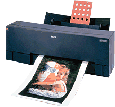
Creating Decals
With The ALPS MD-1000 Printer
The lack of appropriate decal sheet material for model makers has been a barrier that has inhibited model makers the world over. That obscure airline livery, that signage for a truck, the distinctive emblems on shields, those details that weren’t included on any commercial decal sheet - the inability to faithfully render these details has been a restriction for both commercial and professional model makers for years. All that has changed. Custom-made decals can now be produced conveniently and accurately, and mean that the model maker is truly free! If you are now so inclined, you can really make anything you desire. The technology responsible, the ALPS MD-1000 dry-ink printer, paired with a personal PC, has the ability to print on clear decal film, and create high quality decals. This technology has an undeniably revolutionary quality about it, for it means that untried liveries, markings and just about any subject you had no way of doing (especially those ‘little letters and artwork’), is now possible using dry ink printers. The ‘dry ink’ technology is affordable, offering comparable value with ink jet and laser colour printers. Colours are applied in individual cartridges of coloured ribbon. Although the MD-1000 holds four colours, additional colours (such as white and metallics) can be applied. This is done by activating the overlay function in the print set-up, and introducing the other cartridge which overlays a single colour from a file mirroring the original. What you will need Greyware Hardware Software Decal Sheets Doing Decals - Case Study The recent addition of Minicraft 1/144 airliners - the DC-3, Catalina and DC-6, meant these hitherto rare subjects were now available, as was the technology to render their liveries. Although I had ‘batch made’ aircraft before (a subject in its own right), the decision to proceed like this was determined by the need to justify the economics of the decal paper and give the decal making process a decent work out. I started modelling in January 1999 with a view to getting nine New Zealand aviation subjects completed by the date of the IPMS Nationals in April. Research for decals had involved locating old promotional literature for and obtaining as many photographs as the budget will permit. For the TEAL logo, SAFE Air logo and the Mount Cook Lily, I scanned off old timetables. Measurements for the decals where taken directly off the models and backed up with photographic reference. In most instances the typeface desired will not exist. One method I found useful was to use a type that characterises the intended one, print out the words you want in monochrome, scan the words and create a graphics file and modify the graphic as required. I finished full decal sheets for seven 1/144 civil aircraft (although a few door panel decals weren’t applied in time) in a period of about ten weeks. Conclusions Time Opacity Detail Quality Copyright
The Future (More information on ALPS printers can be found on the ALPS USA website. The Internet address is http://www.alpsusa.com/new/page6.html - Ed.) |
Received Periodicals IPMS Deutschland 1-99
Connections - IPMS Wellington, May 1999
|
Wanted Revell 1/32 Mosquito kit, built or unbuilt. Contact Angus Jones. Ph. (09) 534 4255. |
Closing Down Sale Fresh Air Limited is closing down and selling off all unsold/unwanted stock at the June club night. Never to be repeated prices on remaining resin sets, decals and Osprey books, plus Pegasus kits. Cash and cheque only. See Mark Robson after the meeting. |
|
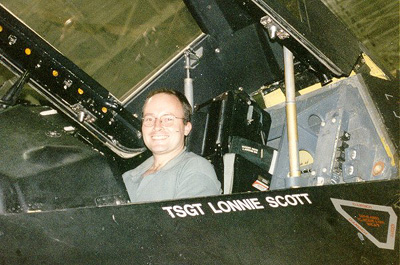
Some Of "Those" Pictures |
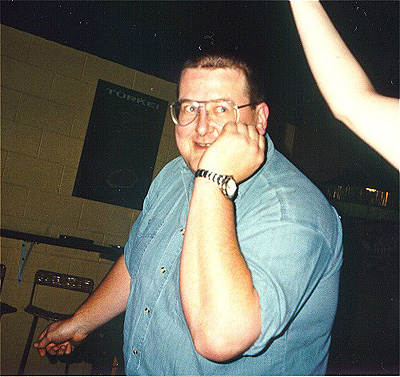 |
This is what happens when you mix super glue, alcohol and belly dancing |
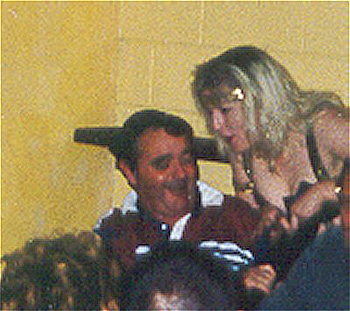 |
The last thing on Bob's mind was what was on the menu! |
|
|
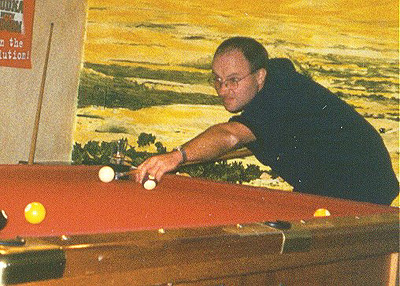
The local pool shark?! |
|
For more information contact us |
|
| The information displayed in these pages
belongs to IPMS New Zealand Auckland Branch and may be copied for personal use only. |
|