When I was a child, my grandfather gave me a series of books from his childhood; the books were called aircraft of the fighting powers. These books were produced during each year of the war, with known aircraft new to the service during the previous year produced as 1/72 scale drawings.
As a kid I would build balsa models using the plans in these books, and always wanted a York. However I never got the chance, as the amount of balsa required to build the York exceeded my weekly pocket money allowance and the thought of carving 4 engines was too daunting for a younger version of myself.
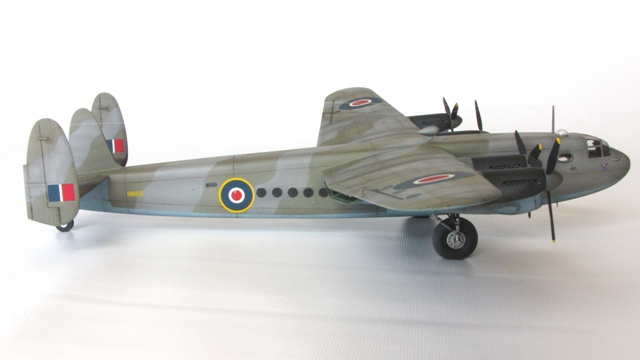
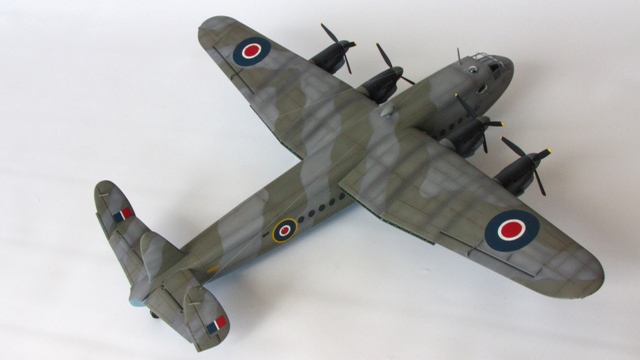
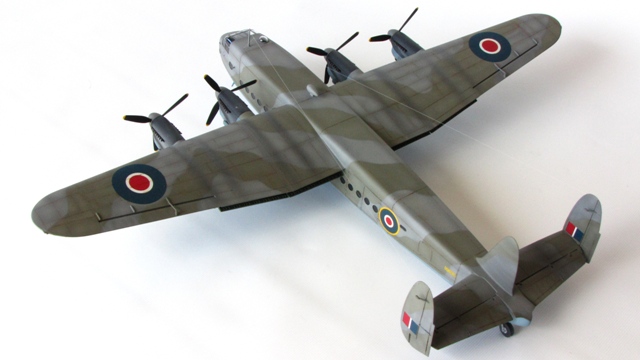
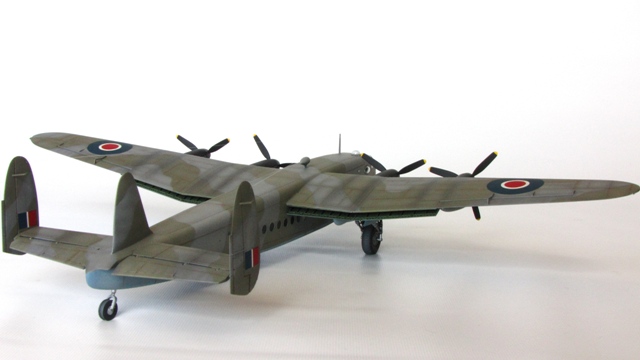
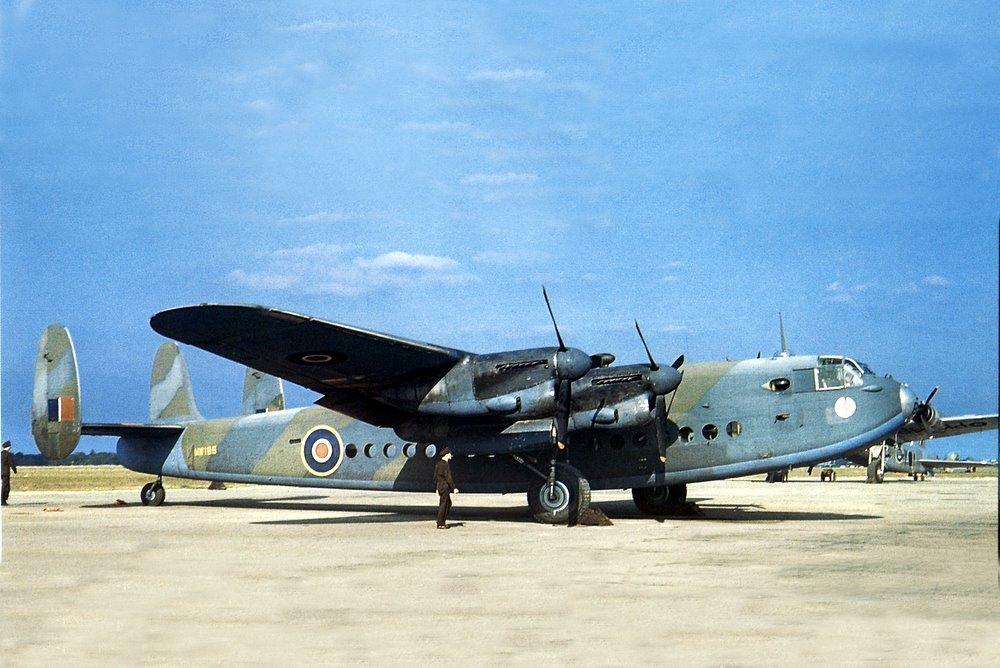
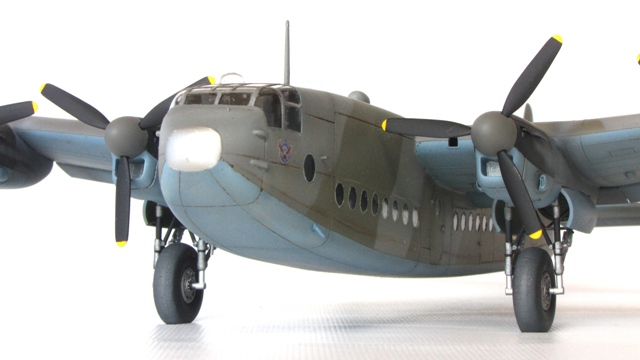
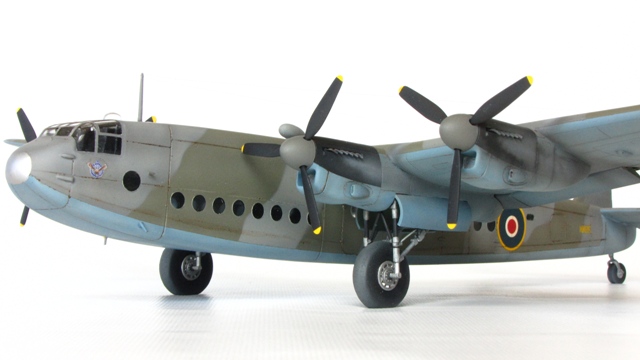
I’d like to get into technical specifications on the York to wow you with my knowledge on the subject, but those kinds of details are not my forte. It is probably best therefore I stick to the basics. The York was based heavily on the successful Lancaster bomber. The wing, engines, landing gear, and tail plane were the same items. However, ask me about images I’ve managed to find online on the subject, and I can produce a large number of images. I trawled the internet for about a year, on and off, looking for wartime or camouflage versions, in green and grey, rather than the more popular green/brown scheme or post war civil colours. The York is pretty illusive when it comes to interesting images of it, but with some careful research a lot of photos can be found.
I was rather happy to hear that CMR were releasing the Avro York conversion a few years back now, it was originally intended to be mated with parts from the Airfix Lancaster. I ordered one as soon as I could. I was happy to pay the hefty NZ$150 price tag for the model, as it’s a model I had always wanted to own. Shortly after I purchased the conversion, Hasegawa released their Lancaster, so I bought the kit so I could have the nice detail from the Hasegawa kit put into my York. Of course a few months later CMR announced they would release a conversion with the Hasegawa kit in mind. I did however decide to continue with my decision, and am glad I did. I had no trouble mating the wings to the fuselage.
| |
 |
|
The main modifications made to the kit were:
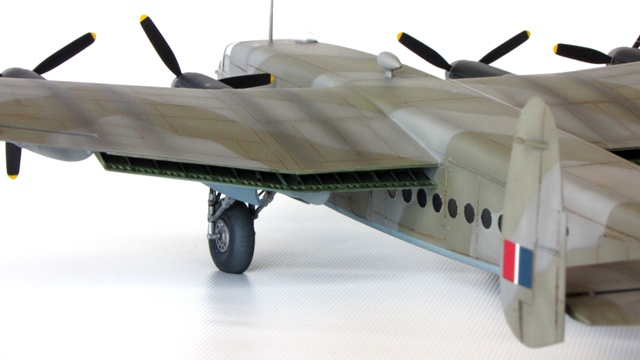
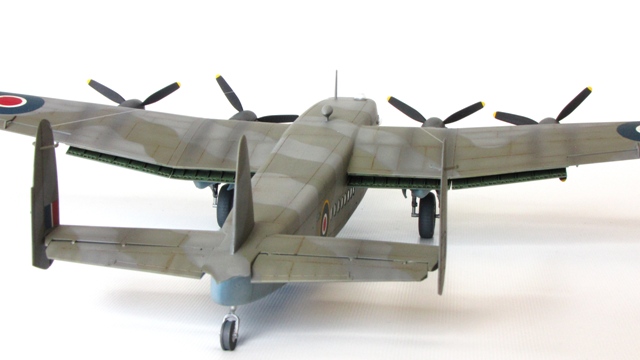
CMK Flaps
CMK tailplanes
Pavla corrected engine intakes
Adding clear Perspex in the fuselage sides for the cabin windows.
Custom decals for an aircraft which flew out of Malta.
Photo etch cockpit parts (now a standard feature of the York kit) -thanks to Mark Davies for arranging these parts for me via CMR.
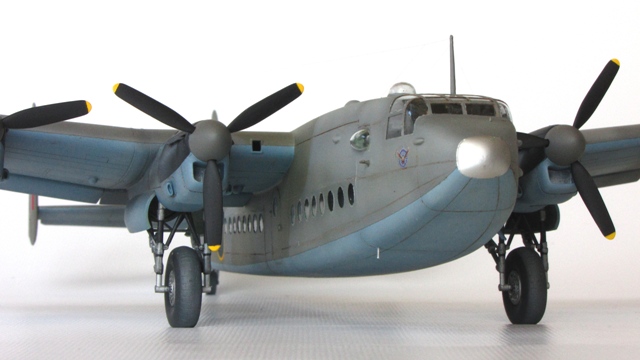
The kit itself is fairly straight forward. The main issue I had with the kit were the cabin windows. The parts supplied were resin clear circles to put in place. I tried this with polishing, but had really average results in getting them to look clear and un distorted. The other issue was the windows were all at different heights along the fuselage, resulting in a scruffy looking set of windows, when viewed looking down the length of the fuselage. What I did in the end was cut away a lot of the fuselage sides, to the nearest panel line, and replace them with Perspex clear panels. A straight line was carefully ruled so I could get the windows at the correct height, and all aligned with each other, circular bits of masking tape produced from a handmade punch, were placed in the correct place for the windows. This way I was assured of getting windows which weren’t only clear and perfectly round, but also all aligned the same height all the way along the fuselage.
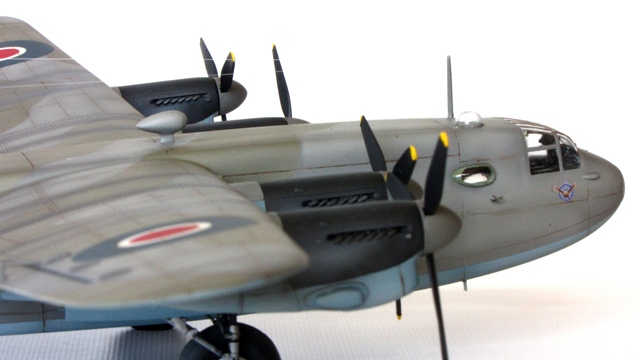 
The CMK flaps were intended for the Lancaster kit. With the wider fuselage of the York, the York’s instructions called for 9mm to be removed from the wings in order to have the correct length wings. This unfortunately meant the Flaps had to be adjusted. Luckily for me the required cut was right on a rib in the flaps, so the cut was an easy one. I decided to have 1 stage of flaps down, as I noticed a lot of York’s in photos had them this way. (Also a friend- Mark Davies, who is building the kit at the same time had them fully down, so I wanted mine slightly different). The other modification required for the flaps to be down was cutting and repositioning the aft part of the inner nacelle. This cut I found difficult, and my results are not as good as I’d hoped.
The paints are Xtracolor, which went down well, although I put it on a little thick, as when I went to do the panel wash, the wash wouldn’t stay in the panel lines. The panel lines were drawn in with a pastel umber pencil- a long task on this size aircraft.
Being a resin kit, and knowing it was a little out of my depth regarding patience in the prep work, the final result isn’t quite as clean as it could be. It’s not a show stopper as far as a clean tidy build is concerned, but is certainly an interesting model to have in my collection. |